Lockdown has been a difficult time for everyone, but a positive to come out of it is that it has inspired many of us to get crafting in ways that we wouldn’t usually. It has made us so happy to see the ways in which our customers have been getting creative, especially when it comes to home decoration!
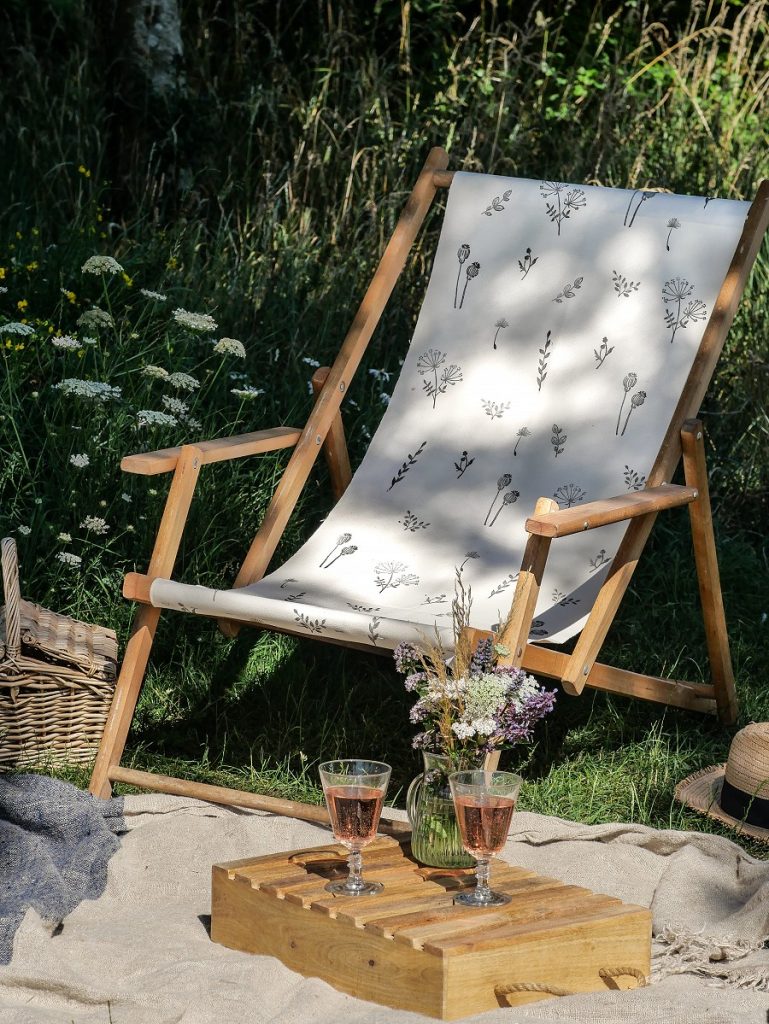
If you have visited us at Kirsty’s Handmade Festival, you may have seen our wonderful hand-stamped deckchairs, which are about 25 years old! We decided to give them a bit of a revamp this summer, and use some of our new designs to give them a fresh look.
Whilst this post is about DIY deckchairs, the technique can of course be carried out on any home furnishings, such as cushion covers, curtains, duvet covers, lampshades… the list goes on! You can see our Pinterest board here showing a wide range of stamped fabrics.
To begin with, you will need:
- a deckchair frame
- some deckchair fabric to be stamped, we got ours from The Stripes Company
- a staple gun
- some scraps of fabric to practise on
- a flat, even surface to lay the fabric onto. We used an old table top
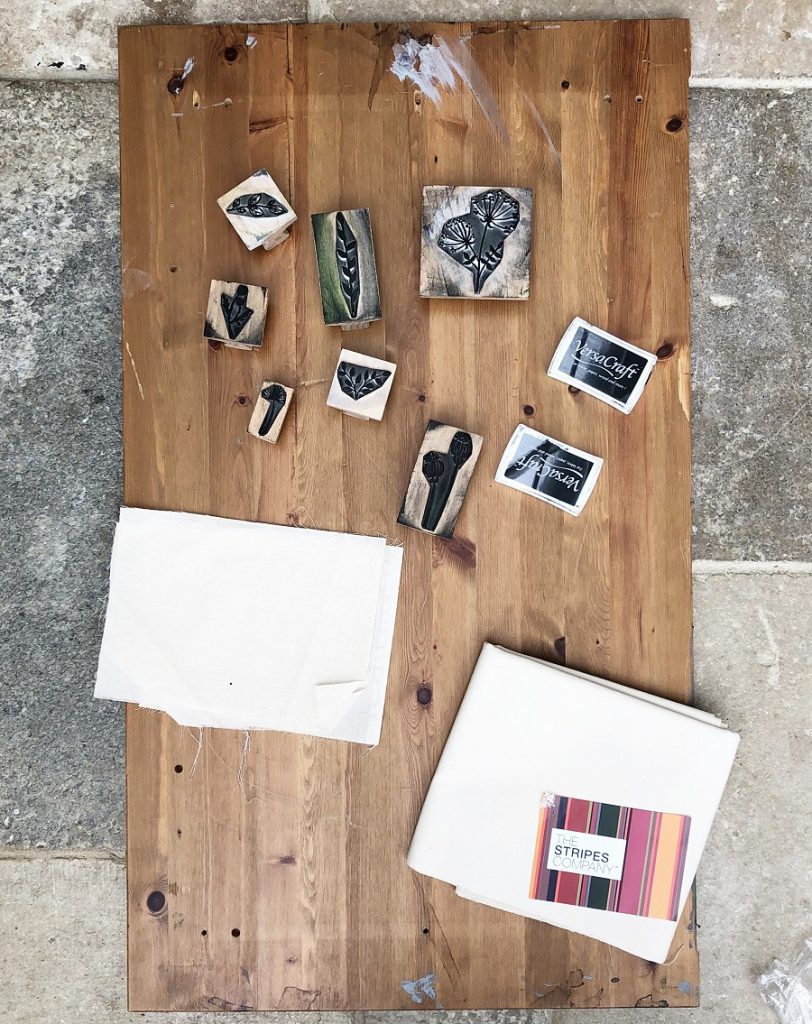
- an ink pad suitable for fabric, we have used VersaCraft Black
- a selection of stamps, we like to use a variation of sizes. For this project we used;
- 4” Grass- code: A008
- 4” Hydrangea- code: A009
- 4” Poppy Seeds 2- code: A014
- 2” Clock Seed- code: A003
- 2” Poppy Seeds- code: A013
- 2” Forsythia Leaves- code: 488
- 2” Leafy Branch- code: 489
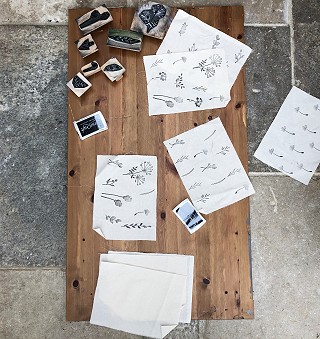
To get started, we always recommend testing your stamps out on the scraps of fabric to get used to how they feel on fabric. If you are used to stamping on paper, it can feel a little different and you will need to work out the right amount and pressure needed for your fabric. It is also a good idea to test out what kind of pattern you want to go for, before going onto the final fabric.
Next, we cut the fabric to the same length as the one we had on before. If you are starting out with just the frame, the supplier will be able to let you know what length of fabric you need, as sizes can vary.
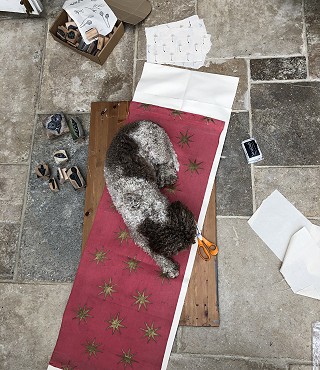
If your pets are anything like ours, they will take any opportunity to claim it as their own, as Ralph has done here!
Once you have perfected your stamping technique, you can begin stamping the deckchair fabric. Lay the fabric out on a flat and even surface, such as a table.
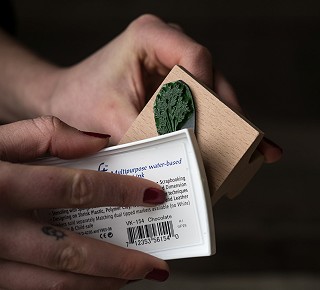
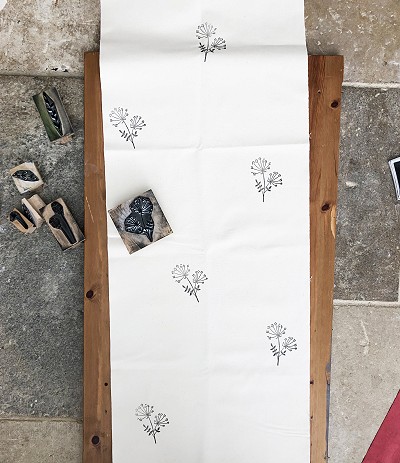
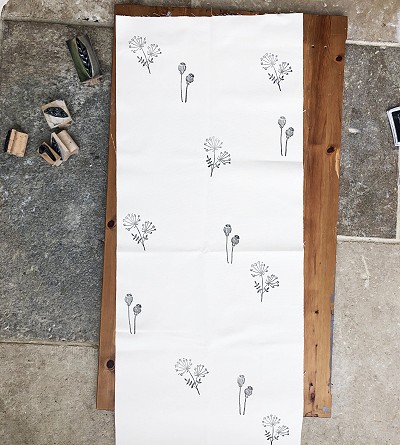
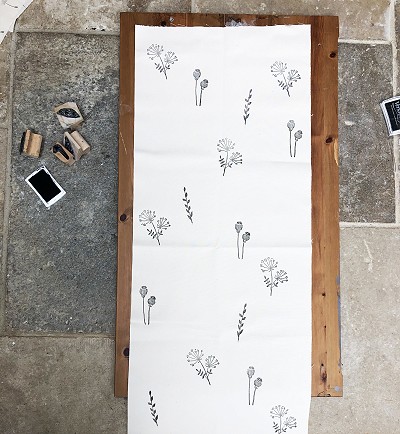
We find it easier to start with the biggest stamp, and work your way down to the smallest. Take your stamp in your more dominant hand and hold it with the rubber side facing up. Apply the ink by dabbing it over the surface of the stamp so that just the raised area of the rubber is inked only. Try to prevent getting any ink on the surrounding areas of the stamp but if you do, wipe them off with a cotton tip or cloth.
We started with one 4” stamp at a time, and stamped it in the pattern that we had decided prior to starting.
Holding the fabric in place, press your stamp down firmly but not with so much pressure that you wobble. Keeping hold of the fabric so that it doesn’t lift, take the stamp away by lifting it straight up. Repeat this technique until you are happy with your first stamp, and then you can move onto the next stamp.
Once complete, leave to dry completely (this shouldn’t take more than an hour) before ironing over the fabric. For this project, a high setting will be best but if you are stamping a more delicate fabric, adjust accordingly. Ironing over the dry ink helps to set the ink in place. This allows it to be washed without the ink running.
Next you will need to use the staple gun to attach the fabric to the frame. As we had two we were making, I left the fabric on one of them so that I could see which way it needed to be stapled on. There are plenty of YouTube videos explaining how to do this correctly however, if you are starting with a new frame. Ensure that it is tight enough. You may need to use a hammer to bash the staples in fully so that it is secure.
Now you have the final deckchairs ready to enjoy and take off for a picnic!