We (Jon & Sasha) launched The English Stamp Company in March 1992. Inspired by a trip to India, where we were overwhelmed by the sights and colours on offer, we returned with an idea to recreate some of the magic of the Subcontinent. We began making stamps to print gold stars onto walls and The English Stamp Company was born out of our small workshop in rural Dorset. In the early days, most of what we created was for the interior design world; stamps for stamping on walls, ceramic tiles, floors and of course, fabric. As the business grew and evolved, the demand shifted towards business stamps, stamps for artists, office & school stamps and more recently, beautiful designs for weddings.
Over the last few years we have been delighted to see that the love of home-crafted homewares and accessories is definitely on the rise again.
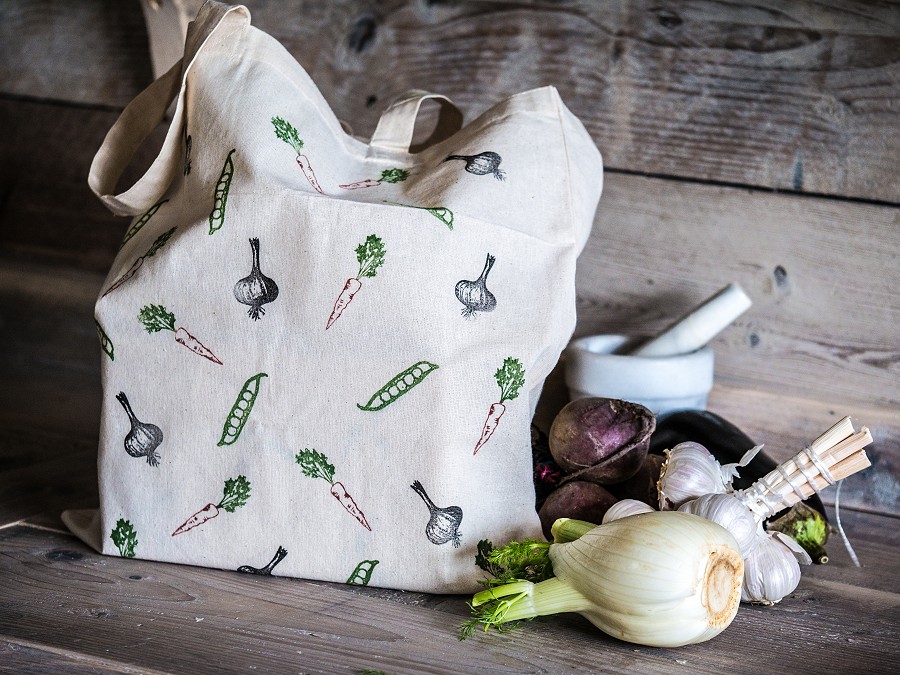
We thought you might like to have a bit of fun following our quick-and-easy tutorial to create your own stamped tote bag. We’re all a little green-fingered on the side so have opted for a vegetable-inspired theme but with over 700 art stamp designs on our website to choose from, the options are endless. If you’re feeling really creative, draw your own design, email it to us and we can turn that in to your very own stamp!
You will need:
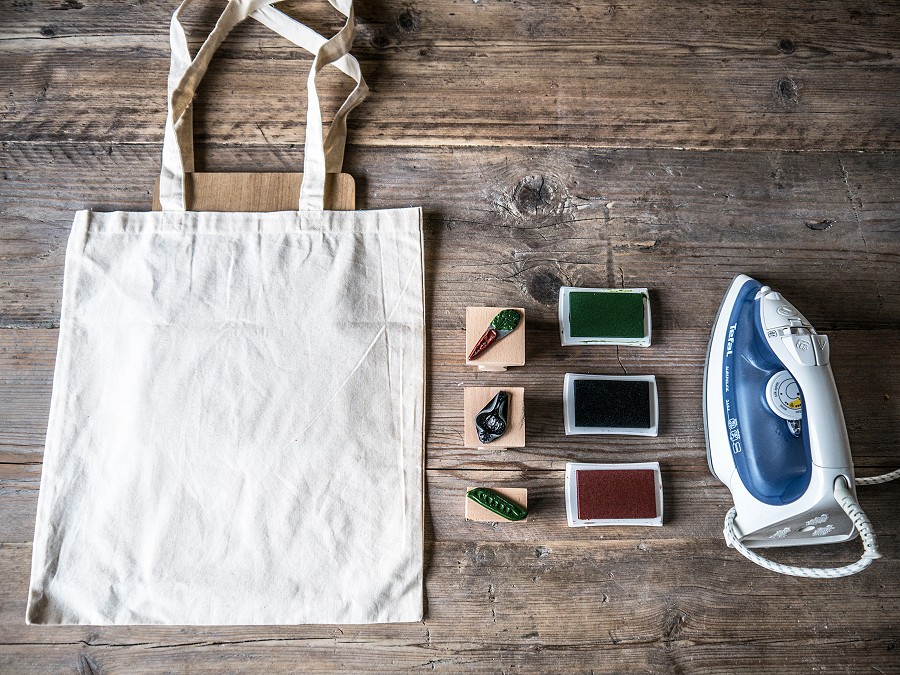
- Tote Bag – pre-washed without fabric softener for the best result.
- Place mat, large book or piece of wood to insert inside the tote when stamping.
- Iron & Ironing board.
- Tea Towel or thin piece of fabric to iron over.
- VersaCraft Ink pads in your choice of colours – we used black, pine and brick.
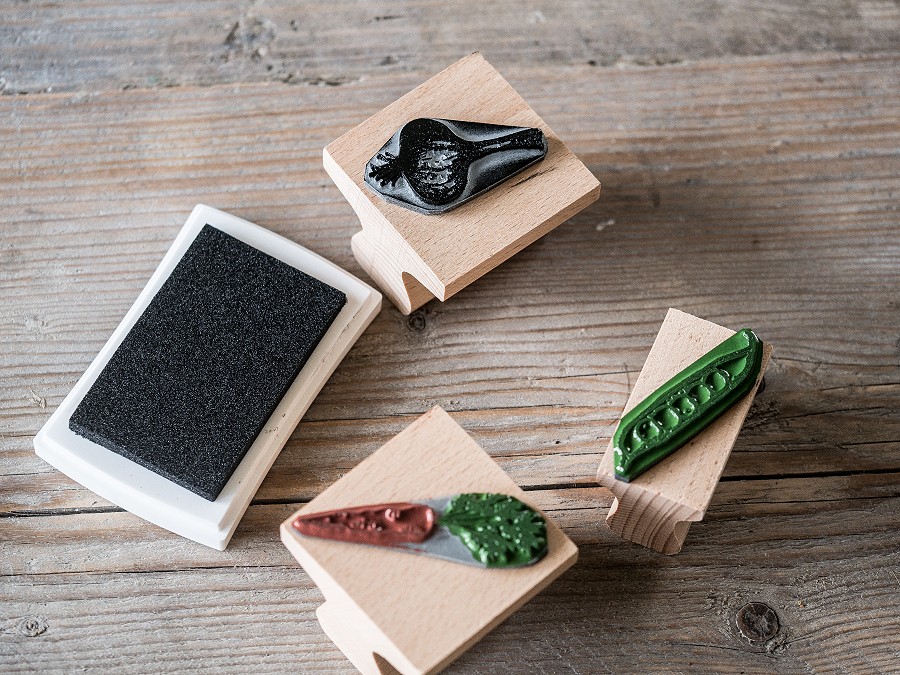
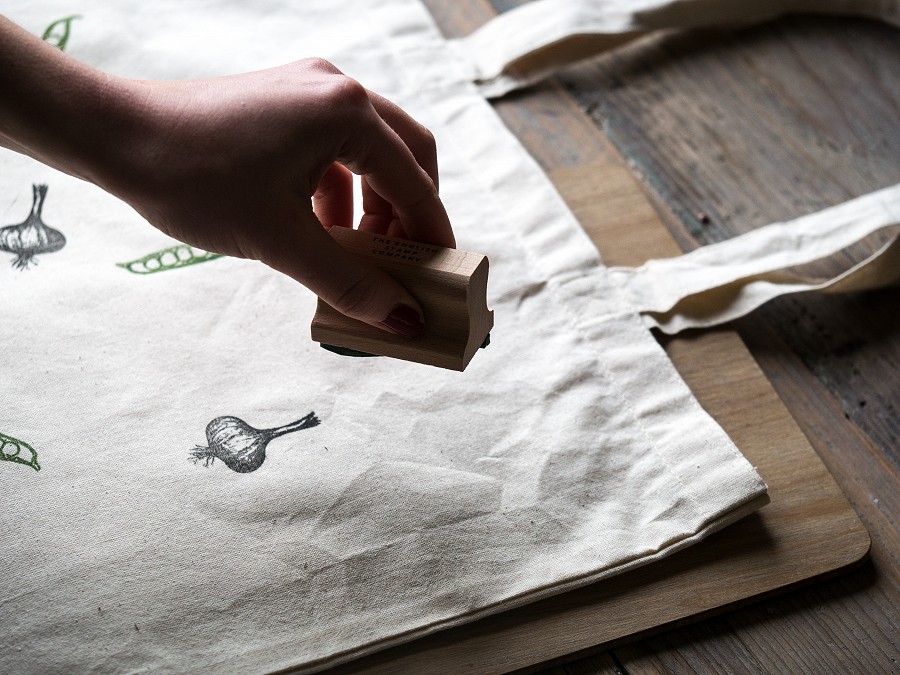
- A selection of Stamps – we used our 2 inch onion, carrot and pea pod.
- Cotton wool buds (optional).
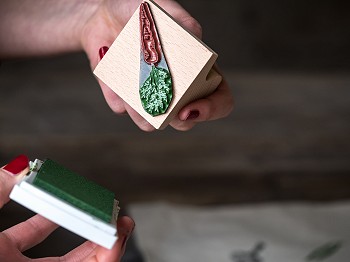
Lay out your tote bag and place a smooth, flat, solid item inside such as a placemat or large book so that you have a firm, flat surface to stamp on. This will also prevent the ink going through to the other side of the fabric. Take your stamp in your more dominant hand and hold it rubber side up. Apply the ink by dabbing it over the surface of the stamp so that just the raised area of rubber is inked only. Using this technique also means you can apply the ink colour to selected areas, such as green to just the carrot tops. Try to prevent getting any ink on the surrounding areas but if you do, wipe them off with a cotton tip or cloth.
Holding the fabric in place, press your stamp down firmly but not with so much pressure you wobble. Keeping hold of the fabric so it doesn’t lift, take the stamp away by lifting it straight up. Repeat this technique until you have one side of your bag covered in your choice of designs. Once complete, leave to dry for an hour or 2 before stamping the reverse side in the same way.
Leave to dry completely (shouldn’t take more than an hour) before laying a tea towel over the bag and ironing over your design. For this project, a high setting will be best but if you stamp other, more delicate fabrics in the future, adjust accordingly.
Top Tips:
Have a play using an old scrap of fabric first to master your stamping technique. If you wish to use the same stamp with a different ink colour, tap your stamp repeatedly on a damp cloth and then on a dry cloth or soft towel. Test the new ink colour on a scrap of paper or fabric before continuing. If your stamp is leaving marks that shouldn’t be there, you may need to apply the ink more sparingly and wipe the edges before stamping on to the fabric. If the impression you’re achieving is too faint, you may need more ink. It is probably best to reapply the ink each time you stamp. Recreate your pattern on kraft paper and a tag to create the perfect gift. Keep going! Don’t stop at a tote, you could soon be dressed head to toe in a fully-stamped ensemble, sitting on a stamped bean bag in a room with stamp-covered walls!